Video thumbnail

Assembly-aware design of masonry shell structures: a computational approach

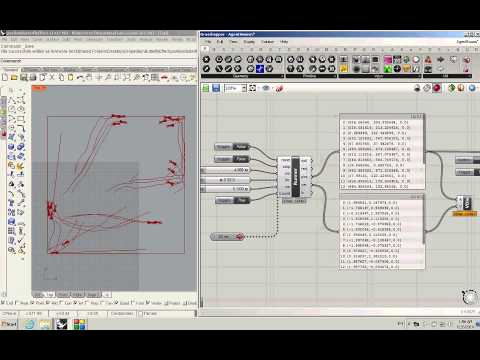
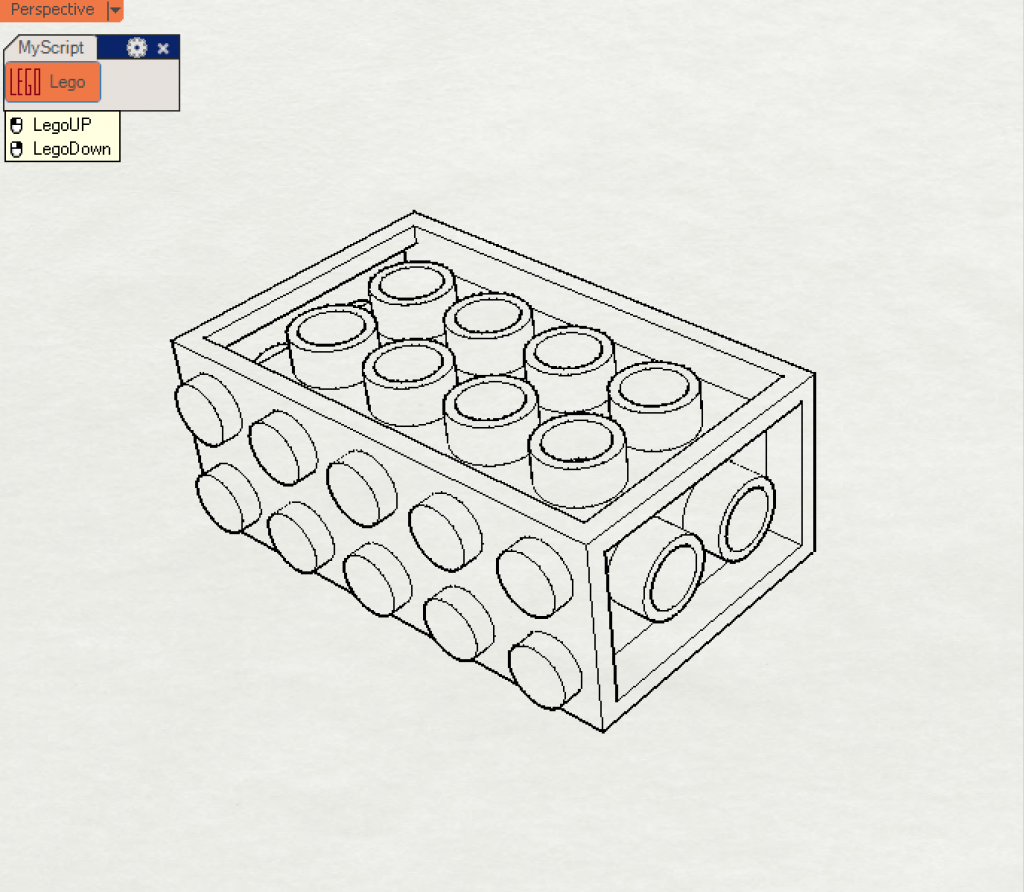
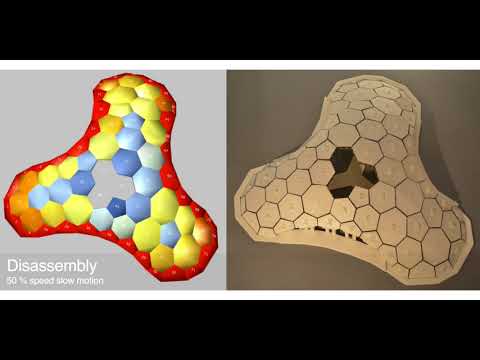
Abstract This paper proposes a workflow for Assembly-Aware Design (AAD) of masonry shell structures and introduces an interactive tool in a CAD environment to assist the design process while simulating the step-by-step assembly of masonry blocks. Thus designers can explore the design space of masonry shell structures and be aware of structural performance before the assembly phase, at the early design stage. Masonry shell structures are an old construction technique, which has recently received a lot of attention due to new computational methods. Even though the form of such a structure is optimised for structural performance, its incomplete form during construction often requires the support of falseworks, which can be extensive, costly and time-consuming. To tackle this unsolved problem, we developed an assembly strategy that significantly reduces the falsework usage while still maintaining the equilibrium of the incomplete shell at each assembly step. The key idea is to compute a disassembly strategy inspired by the Jenga game and then reverse it to obtain the actual assembly sequence of the masonry blocks. Rather than using discrete element methods to predict the structural behaviour of the masonry blocks, we employed the GPU-based rigid-body dynamic solver from the engine NVIDIA PhysX, this allows very fast computation speeds while still offering sufficient accuracy for our purposes. Finally, we verified our method using small-scale 3D printed models. ...

October 3, 2017 · 2 min · Gene Ting-Chun Kao
Video thumbnail

ICD/ITKE Research Pavilion 2015-16 - development and implementation demo

I was in the computational design team while designing the ICD/ITKE Research Pavilion 2015-16 and was mainly in charge of developing computational tools. Here is the demonstration video to show the geometrical implementation. One of the input parameters from the plugin is a mesh surface, and the output parameters are all tree data structure thus some double-layer light weight structure as well as some planar plates can be generated (Planar plate wasn’t realized due to the decision making and scheduling during the development). All the geometries are labeled in the right sequence so they can be fabricated directly: ...

October 30, 2016 · 1 min · Gene Ting-Chun Kao
Video thumbnail

Swarm 3D GUI – with a tail

I wrote this short swarm script with GUI interface in Processing about 4 years ago (When I began to code)… Now I figure out lots of code from this script should be improved! For instance, we can implement KDTree later… Hope this code from the previous version will help people who needs or interested in it. Processing Source Code: drawLineFish3DUI.pde //============================================================================ // Name : drawLineFish3DUI.pde // Author : Gene Ting-Chun Kao // Version : 2012-7-19 // Copyright : GNU General Public License // Description : Swarm 3D with Tail GUI //============================================================================ import toxi.geom.*; import processing.opengl.*; import peasy.*; import controlP5.*; import java.util.Calendar; Manage man; PeasyCam jCam; ControlP5 jControl; ArrayList fishes; PMatrix3D currCameraMatrix; PGraphics3D g3; int c1 = 0; int c2 = 0; int c3 = 0; boolean attractor = false; boolean stop = false; void setup() { size(1200, 800, OPENGL); smooth(); g3 = (PGraphics3D)g; jCam = new PeasyCam(this, 100); Slider(); man = new Manage(400, 50); man.createFish(); } void draw() { if (jControl.window(this).isMouseOver()) { jCam.setActive(false); } else { jCam.setActive(true); } background(0); man.display(); gui(); } void keyReleased() { if (key == 's' || key == 'S') saveFrame(timestamp()+"_##.png"); } String timestamp() { Calendar now = Calendar.getInstance(); return String.format("%1$ty%1$tm%1$td_%1$tH%1$tM%1$tS", now); } void Slider() { jControl = new ControlP5(this); //mousePosistion jControl.addSlider("c1",-200,200,10,610,100,10); jControl.addSlider("c2",-200,200,10,630,100,10); jControl.addSlider("c3",-200,200,10,650,100,10); jControl.addToggle("attractor", false, 10, 680, 100, 10).setMode(ControlP5.SWITCH); jControl.addToggle("stop", false, 10, 715, 45, 10); jControl.setAutoDraw(false); } void gui() { currCameraMatrix = new PMatrix3D(g3.camera); camera(); jControl.draw(); g3.camera = currCameraMatrix; } Fish.pde ...

May 2, 2016 · 5 min · Gene Ting-Chun Kao
Rhino.Python Swarm Bridge

Rhino.Python

These are my Rhino.Python practice while I studied at Stuttgart University. Rhino.Python - 1D 2D 3D Rhino.Python - Swarm bridge Rhino.Python - tessellation and subdivision Rhino.Python - Boy Surface and subdivision Rhino.Python - 1D 2D 3D """ #################################################################### Computational Design Assignment 02 Kao, Ting-Chun Assignment to use for loop #################################################################### """ from scriptcontext import doc, escape_test import rhinoscriptsyntax as rs import Rhino.Geometry as rg import Rhino.DocObjects as rd import Rhino import time import System.Guid as guid import System.Drawing as sd import math import random dimension = rs.GetInteger("give me one to three dimension: ", 2, 1, 3) print(dimension) # some functions def PtMat(x, y, z): pt = rg.Point3d(x, y, z) materialIndex = doc.Materials.Add() material = doc.Materials[materialIndex] if dimension == 2: if x > 0 and y>0 and z>0: material.DiffuseColor = sd.Color.FromArgb(y/5*255*0.5, y/5*255*0.5, y/5*255) else: material.DiffuseColor = sd.Color.FromArgb( 255, abs(math.sin(x))*255, 255) material.CommitChanges() attr = Rhino.DocObjects.ObjectAttributes() attr = rd.ObjectAttributes() attr.MaterialSource = Rhino.DocObjects.ObjectMaterialSource.MaterialFromObject attr.MaterialIndex = materialIndex if dimension == 2: sphere = rg.Sphere(pt, (y+5)/5) elif dimension == 3: sphere = rg.Sphere(pt, 0.2) else: sphere = rg.Sphere(pt, 2) if doc.Objects.AddPoint(pt, attr) != guid.Empty: doc.Objects.AddSphere(sphere, attr) return pt def noneLoopPt(): pt = PtMat(i*math.sin(5*i), i*math.cos(5*i), i) return pt def oneLoopCrv(): pts = [] for x in range(50): y = math.sin(x) * math.sin(i) pts.append(PtMat(5*x, 5*y, 5*i)) crv = rs.AddCurve(pts) return crv def twoLoopCrv(): pts = [] crvs = [] for x in range(30): for y in range(40): a = ( i + math.cos(x/2)*math.sin(y) - math.sin(x/2)*math.sin(2*y) ) * math.cos(x) b = ( i + math.cos(x/2)*math.sin(y) - math.sin(x/2)*math.sin(2*y) ) * math.sin(x) c = 10*math.sin(x/2)*math.sin(y) - math.cos(x/2)*math.sin(2*y) pts.append(PtMat(a, b, c)) crv = rs.AddCurve(pts) crvs.append(crv) return crvs def threeLoopSrf(): # haven't getten any idea to having a good one. return 0 def drawTime(): FPS = 30 last_time = time.time() # setup variables global i i = 3 curves = [] pts = [] # whatever the loop is... while True: # draw animation if dimension == 3: i += 3 else: i += 1 # pause so that the animation runs at 30 fps new_time = time.time() # see how many milliseconds we have to sleep for # then divide by 1000.0 since time.sleep() uses seconds sleep_time = ((1000.0 / FPS) - (new_time - last_time)) / 1000.0 if sleep_time > 0: time.sleep(sleep_time) last_time = new_time if dimension == 2: crv = oneLoopCrv() curves.append(crv) if i > 20: rs.AddLoftSrf(curves) break elif dimension == 3: curves = twoLoopCrv() escape_test() else: pt = noneLoopPt() pts.append(pt) if i > 80: #rs.AddLoftSrf(curves) rs.AddCurve(pts) break escape_test() def main(): drawTime() if __name__ == "__main__": main() Rhino.Python - Swarm Bridge Swarm Behavior + Attractor : Agent methods: 1. Align : Move in the same direction as your neighbours. 2. Cohesion : Remain close to your neighbours. 3. Seperation : Avoid collisions with your neighbours. Attractor methods: (Controlling the shape) From starting points move to target points to create bridge. Using swarm simulation in Grasshopper is in this post: Swarm Python GH Component ...

November 30, 2014 · 11 min · Gene Ting-Chun Kao
Computation and Aesthetics portfolio

Computation and Aesthetics

Gene Kao, Ting-Chun portfolio 2008-2013

September 18, 2014 · 1 min · Gene Ting-Chun Kao
Processing 101

Processing 101

My Processing 101 creative coding experiments. 00 Kamehameha Simple 01 Attractor2DSimple 02 BouncingBallSimple 03 Wave 05 waterPipe 06 TwoPlayersGA Processing 101 – 00 Kamehameha Simple Kamehameha かめはめ波 龜派氣功 instruction Press you mouse left button. Drag it in the opposite direction. And you will find out it open fire automatically. Dictionary: Kamehameha かめはめ波 龜派氣功 Code Inspired From: Processing.js learning Sample float radius = 50; int X, Y; void setup() { size( 650, 200 ); strokeWeight(10); fill( 198, 81, 10); stroke(255); X = width/2; Y = height/2; } void draw() { background(100); radius += sin(frameCount/10); ellipse(X+=(X-pmouseX)/16, Y+=(Y-pmouseY)/16, radius, radius); } void mouseMoved() { X = mouseX; Y = mouseY; } Processing 101 – 01 Attractor2DSimple Attractor Each circle on the grid points change its diameters, which based on distance between mouse position and point’s location. Dictionary: Attractor 吸引子,原本為複雜科學裡的一個專有名詞,近期廣被用來描述於Parametricism。 最先被運用在Grasshopper裡頭。 ...

July 25, 2014 · 9 min · Gene Ting-Chun Kao
Swarm Python Component

Swarm Python Component

Swarm in Grasshopper using GH_Python component. Testing swarm behaviour in Rhino is in this post: Rhino.Python Swarm Bridge For more discussion please visit my post in grasshopper example forum. GH_Python Code: ### --Written by Gene Ting-Chun Kao-- ### ghenv.Component.Message = "written by +GENEATCG" import rhinoscriptsyntax as rs import Rhino as rc from random import * rectX = 600 rectY = 600 class Runner: def __init__(self, p, v): self.p = p self.v = v self.a = rs.VectorCreate( (0,0,0),(0,0,0) ) def ptRun(self): self.v = rs.VectorAdd(self.v, self.a) v = rs.VectorLength(self.v) if v > 2: self.v = rs.VectorScale(rs.VectorUnitize(self.v), 2) self.p = rs.VectorAdd(self.p, self.v) self.a = rs.VectorCreate( (0,0,0),(0,0,0) ) # ... (full code on GitHub)

June 25, 2014 · 1 min · Gene Ting-Chun Kao
LEGO Component for 3D Printing

LEGO Component for 3D Printing

在Rhino3D軟體裡用python程式語言 創造客制化的樂高原件。 LEGO customised components developed through Python script using Rhino 3D software. We can design our own LEGO components via 3D printer. Mouse left click → make LEGO up part Mouse right click → make LEGO down part How it works: Replace any surface with a LEGO unit. Dimensions reference here. Trim a hole. Extrude surfaces. Join all faces.

December 14, 2013 · 1 min · Gene Ting-Chun Kao
Clock Design

Clock Design

Clock Design using Processing ClockDesign_001_Basic ClockDesign_002_Mondaine ClockDesign_001_Basic Clock Design through code. Minimalism 時間設計 — 極簡風 float h, m, s; void setup() { size(650, 650); smooth(); } void draw() { background(200); pushMatrix(); translate(width/2, height/2); strokeWeight(1); stroke(100); noFill(); ellipse(0, 0, 400, 400); s = 6*second()*(TWO_PI)/360 - PI/2; m = 6*minute()*(TWO_PI)/360 - PI/2; h = 30*hour()*(TWO_PI)/360 - PI/2; fill(255); for (int i = 0; i <= 60; i++) { strokeWeight(1); line(cos(i*6*(TWO_PI)/360)*203, sin(i*6*(TWO_PI)/360)*203, cos(i*6*(TWO_PI)/360)*190, sin(i*6*(TWO_PI)/360)*190); ellipse(cos(i*6*(TWO_PI)/360)*200, sin(i*6*(TWO_PI)/360)*200, 5, 5); if (i % 5 == 0) { strokeWeight(2); line(cos(i*6*(TWO_PI)/360)*203, sin(i*6*(TWO_PI)/360)*203, cos(i*6*(TWO_PI)/360)*180, sin(i*6*(TWO_PI)/360)*180); ellipse(cos(i/5*30*(TWO_PI)/360)*200, sin(i/5*30*(TWO_PI)/360)*200, 10, 10); } } noStroke(); fill(255); ellipse(0, 0, 10, 10); //ellipse(cos(s)*200, sin(s)*200, 10, 10); //text(s + ", "+ second(), cos(s)*200, sin(s)*200); ellipse(cos(m)*200, sin(m)*200, 20, 20); //text(m + ", "+ minute(), cos(m)*200, sin(m)*200); ellipse(cos(h)*200, sin(h)*200, 20, 20); strokeWeight(5); stroke(100); line(cos(s)*180, sin(s)*180, cos(s)*10, sin(s)*10); strokeWeight(8); line(cos(m)*150, sin(m)*150, cos(m)*10, sin(m)*10); strokeWeight(10); line(cos(h)*100, sin(h)*100, cos(h)*10, sin(h)*10); popMatrix(); } ClockDesign_002_Mondaine Clock Design through code. Mondaine 時間設計 — 瑞士國鐵表 ...

December 12, 2013 · 2 min · Gene Ting-Chun Kao